Hi friends, I recently joined a meet-up call for members of the Craft Industry Alliance. One of the participants mentioned a desk blotter and my wheels started turning….
As you can see from the photo below, I’m a doodler and chaotic note-taker. I decided a beautiful slab of paper to capture all the daily reminders and serve as a canvas for doodles was just what I needed. (Obviously, cat Millie agrees.)
Could I combine a desk blotter with slow stitching or a snippet roll? I decided to try…
A Tutorial of Sorts
To make the blotter, I started by cutting a 20-by-16-inch rectangle of heavy cardboard from the backing of a very large sketchpad. (You could use whatever size piece of cardboard you like, based on the size of your desk or the size of the paper you’ll tuck inside it.)
On the back of the cardboard, measure up from each corner 3.5 inches, then make a small mark.
I slow stitched circular designs onto a strip of fabric about 22 inches long and 2 inches wide. You can use whatever designs or stitching you like. This is also a great use for a snippet roll that you don’t mind cutting up.
Next, cut 4 trapezoids with the following dimensions from the strip to serve as the corners on the blotter.
To make the pattern piece, cut a rectangle from paper 6.5 inches by 2 inches. To create the shape with a 2.5-inch side on the top, fold the rectangle in half to create a center line. From the center line, measure out 1 1/4 inches to one side and put a dot. Do the same on the other side of the center line.
Draw a line from the dot at the left side of the top to the bottom left corner of the rectangle. Repeat on the right side. Use the lines you drew as cutting lines to create a trapezoid that measures 2.5 inches at the top and 6.5 inches along the bottom edge.
Use the pattern to cut four pieces from your strip of stitched fabric or snippet roll. To save fabric, alternate the pattern piece up and down vertically as you cut the pieces.
Your corner pieces should look like this when cut. (Note that this photo is somewhat distorted: The pieces below are all equal size.)
Start at one corner of the cardboard and lay the corner piece in place, lined up with the markings you made and with about 1/2 inch of the angled edge wrapping around to the back. The long side of the trapezoid will face in toward the center of the cardboard. This photo shows the back side of the cardboard.
Using plenty of fabric glue (or any glue that dries clear) fold the edges over the back side of the cardboard and glue in place. Coating the edges with glue will keep the fabric from fraying or any loose stitching from coming undone.
Repeat the same wrapping and gluing process on all four corners. When you’re done, the front should look like this:
Now, add as many pieces of paper as would like. I cut large pieces from a roll of drawing paper, but you can use any type of paper you prefer.
Here’s how a corner made with a section of snippet roll looks:
Let me know if you have any questions!
Fun Pattern From Banjoflannel!

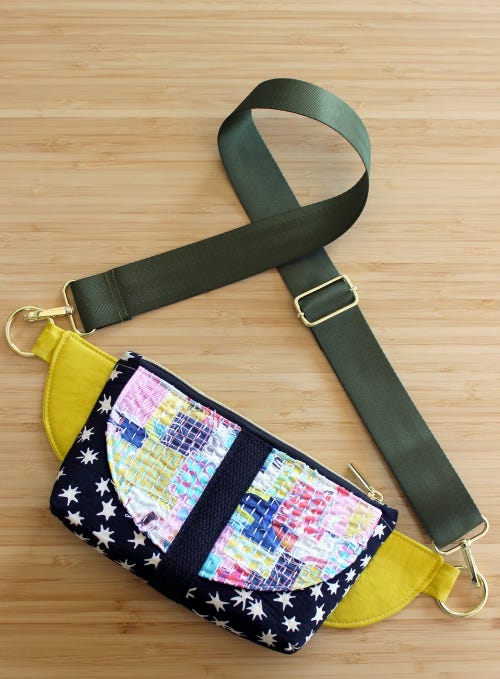
This sweet sling bag from designer Diana Li Fitzgerald at Banjoflannel features a flap with kantha-inspired slow stitching. Purchase the pattern on Etsy or visit the Banjoflannel website to get inspired by more of Diana’s patterns and projects.
Have a great week and happy stitching!
—Janice


